
Have you ever looked at a plain denim jacket, a basic canvas tote bag, or a favourite comfy t-shirt and thought: “This really needs a tiny stitched strawberry on the pocket?” You are definitely not alone. The modern cross-stitch community is officially moving beyond the traditional wooden frame. Upcycling clothing and accessories with custom needlework is one of the biggest trends right now. It is the ultimate way to take your favourite hobby out into the real world, turning your clothes into a walking gallery of your own creativity.
But if you’ve ever tried to cross-stitch freehand onto a regular piece of clothing, you already know the frustrating truth: without those perfectly square grid lines to guide your needle, your neat rows quickly turn into a chaotic, wobbly mess. Regular clothing fabric just isn’t woven for cross-stitching.

Let’s dive into how to use these canvases to transform your wardrobe without warping your fabric or ruining your clothes!
1. Waste Canvas vs. Water-Soluble Canvas: Which One Do You Need?
While both materials serve the exact same purpose—giving you a temporary grid on normal fabric—they work in completely different ways. Choosing the right one depends entirely on your project and the fabric you are using.
Waste Canvas (The Pull-Away Method)
Waste canvas looks like a piece of stiff, loosely woven Aida cloth. You baste or pin it onto your clothing, stitch your pattern directly through both layers, and then get the fabric damp. The moisture softens a special starch in the canvas, allowing you to use tweezers to pull the canvas grid apart, thread by thread, leaving only your beautiful stitches behind.
Best for: Sturdy fabrics like denim jackets, canvas tote bags, heavy cotton aprons, and corduroy.
Water-Soluble Canvas (The Melting Method)
This material feels like a flexible sheet of clear, gridded plastic. You pin or stitch it onto your T-shirt, complete your cross-stitch, and then submerge the entire garment in a bowl of warm water. Like magic, the plastic completely dissolves in a matter of minutes, leaving zero residue.
Best for: Stretchy, delicate, or lightweight fabrics like t-shirts, sweatshirts, linen shirts, and baby clothes. Because you don’t have to pull at the threads, there is zero risk of stretching out the garment.
2. A Step-by-Step Guide to Perfect Clothing Stitches
Stitching on clothing takes a tiny bit of extra prep work, but following these steps ensures your design looks flawless and stays secure after it’s been through the washing machine.
- Step 1: Prep and Stabilise. Wash and dry your garment first to handle any natural shrinkage. If you are stitching on a stretchy fabric (like a cotton t-shirt), iron a piece of lightweight fusible stabiliser to the inside of the shirt behind where your design will go. This prevents the fabric from stretching out while you stitch.
- Step 2: Position Your Canvas. Cut your waste or water-soluble canvas so it is at least an inch larger than your design on all sides. Position it on your clothing, and use a needle and a contrasting color of thread to sew long, loose running stitches around the edges to hold it perfectly flat. (Trust us, pins will snag your thread!)
- Step 3: Watch Your Tension. Pop your clothing into an embroidery hoop if the fabric allows, but be careful not to pull it too tight. As you stitch, make sure your needle goes straight down and straight up through both the canvas and the clothing. Keep your tension firm but gentle—if you pull too hard, the clothing fabric will pucker when the canvas is removed.

3. The Grand Finale: Removing the Canvas
Once your last stitch is secured, it’s time for the most satisfying part of the entire project: making the grid disappear.
If you used water-soluble canvas, fill a sink or bowl with warm, soapy water. Submerge the stitched area and gently agitate it with your fingers. Within a few minutes, the plastic will soften into a gel and rinse clean away. Give it a final rinse in cold water and lay it flat to dry.
If you used waste canvas, use a spray bottle to thoroughly dampen the area, or let it sit under a damp towel for 5 minutes. Take a pair of tweezers, grab a single strand of the waste canvas at the edge, and gently pull it out horizontally. It should slide right out from under your stitches! Continue pulling the threads out one by one (do the short threads first, then the long ones) until your design stands alone on the clothing.
4. Washing Your Upcycled Masterpiece
You’ve put hours into custom-stitching your clothes, so you definitely want them to last! Taking care of your hand-stitched garments in the washing machine is actually much easier than it sounds.
First, always turn the garment inside out before washing. This protects the front of your stitches from rubbing against zippers, buttons, or the drum of your washing machine.
Wash your upcycled clothes on a gentle or delicate cycle using cold water. Avoid using harsh bleaches or intense stain removers directly on the stitched area.
When it comes to drying, air drying is always the safest bet to prevent shrinkage and keep your floss looking vibrant. However, if you must use a dryer, use a low-heat setting. When ironing the garment, always iron it inside out or place a clean, fluffy towel over the stitches so you don’t flatten the beautiful texture of your cross-stitch.
5. Stitchly Pro-Tip: The “Scratch-Free” Backing Hack
If you are cross-stitching onto a t-shirt or a sweatshirt, the back of your stitches can sometimes feel a little scratchy against sensitive skin.
To fix this, buy a small sheet of “Cloud Cover” or iron-on backing for embroidery. Cut a piece slightly larger than your stitched design, iron it over the messy back of your stitches on the inside of the shirt, and voila! A soft, smooth barrier that protects your skin and locks your threads safely in place forever.

In a Nutshell
Stitching beyond the hoop is an incredible way to inject your unique personality into your everyday style. Whether you start small with a tiny flower on a collar or go big with a massive statement piece on the back of a jacket, using temporary canvas opens up a whole new world of crafting possibilities.
It turns your wardrobe into a creative journey, where every outfit tells a story of patience, craft, and style.
Up next…
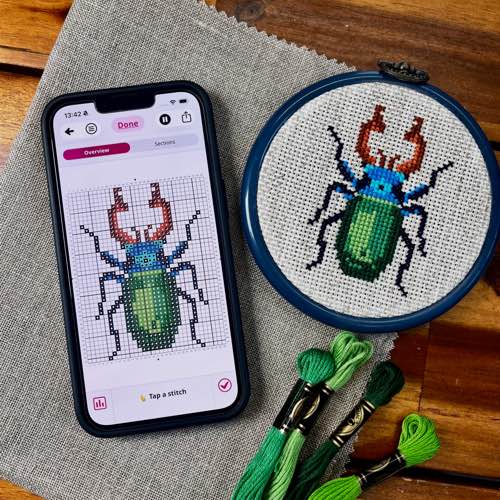 |
The Paperless Stitcher: How to Transition Your Workflow from Printed Charts to Digital Devices Read now › |
Create your own designs
Easily create your own cross stitch patterns by converting images or drawing your own designs using the Stitchly app.
Download now
Try Stitchly now on iPhone, iPad and Android. The full version is a one-time purchase.
Are you a blogger?
Feel free to write about Stitchly on your blog! Please include a link to the Stitchly website so that your visitors can find out more. Thank you 😊
Want to learn more?
Choose a professional designer or one of the guides below to learn more.
 |
Abi Skinner› |
 |
Tatiana Kecskemeti› |
 |
Nic Sworen› |
 |
How to convert a photo into a cross stitch pattern› |
 |
How to draw cross stitch patterns› |
 |
How to sell your cross stitch patterns› |